You can make a toilet flush (cistern + bowl system) look and work like new with a simple deep-clean routine. The key is cleaning both the visible bowl and the hidden flushing parts inside the tank and rim holes.
🧼 1. Clean the toilet bowl (inside)
- Pour toilet cleaner or disinfectant under the rim (products like Harpic or similar).
- Let it sit for 10–15 minutes (don’t flush immediately).
- Scrub thoroughly with a toilet brush, especially under the rim.
- Flush to rinse.
👉 For stains: use a pumice stone lightly on mineral deposits (only on porcelain).
🚽 2. Clean the flush rim holes (important step most people skip)
- Look under the rim where water comes out.
- Pour vinegar or toilet descaler into the bowl.
- Use a small brush or old toothbrush to scrub inside the rim holes.
- This improves flush strength and removes hidden buildup.
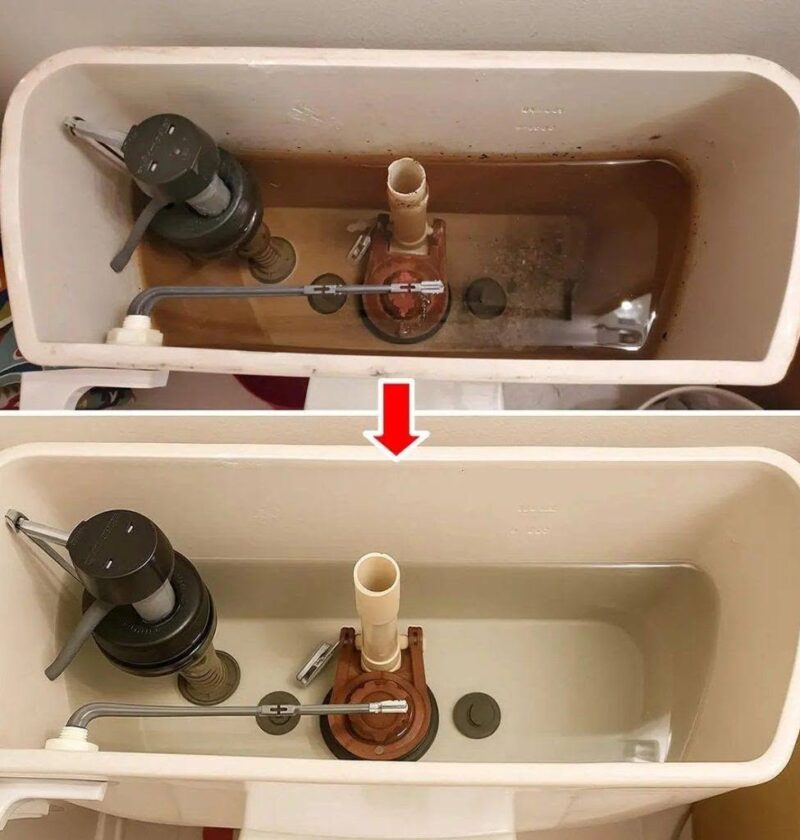
🧴 3. Clean inside the cistern (tank)
Turn off water supply first.
- Flush once to empty most water.
- Add white vinegar or toilet descaler into the tank.
- Let it sit 30–60 minutes.
- Scrub inside walls and around the flush mechanism.
⚠️ Don’t mix vinegar with bleach-based cleaners.
🔧 4. Check the flush mechanism
- Make sure the flapper/valve isn’t stuck or covered in slime.
- Clean gently with a cloth or sponge.
- Remove any limescale buildup that slows flushing.
✨ 5. Finish and maintain
- Turn water back on and flush several times.
- Wipe external parts (handle, lid, base).
- For maintenance: clean weekly, deep clean monthly.
💡 Quick tip
If your toilet still flushes weakly after cleaning, the issue is often blocked rim jets or a worn flapper, not dirt alone.
If you want, tell me your exact problem (bad smell, weak flush, yellow stains, or slow refill), and I can give a targeted fix.